Plastic products are in our lives everywhere. During the plastic products development process, Plastic prototype verification before mass production is very common. But do you know how to make the plastic prototypes? Today we will explore different rapid prototyping methods for creating plastics Prototype.
What is Plastic Prototyping?
Plastic prototyping is the first step for a product to create a preliminary version of the plastic product. It’s a way to assess or test the product before going to mass production. Depending on the purpose, a plastic prototype can be created with different prototyping methods and materials.
Why Plastic Prototypes Are Important?
Creating a plastic prototype is a valuable step for businesses, especially when it fits with three main testing stages: Engineering Validation Test (EVT), Design Validation Test (DVT), and Production Validation Test (PVT). These stages are essential for making sure the product is perfect before mass production.
- Engineering validation testing (EVT): A plastic prototype helps check the technical design. It ensures the product works as planned and meets engineering requirements.
- Design validation testing (DVT): This stage focuses on the look and feel. Testing here ensures the product’s appearance, durability, and user experience are just right.
- Production validation testing (PVT): Finally, the prototype is used to confirm that the product can be produced in large quantities without losing quality.
Prototypes also help present ideas to investors and stakeholders. Having a physical model lets them see and touch the product, making it easier for them to understand its value. For market testing, plastic prototypes can be shared with potential customers, gathering their reactions and feedback before the product is officially launched.
Overall, this process helps designers and prototyping companies make important adjustments. It ensures that both the manufacturer and the user get a high-quality, market-ready product, supporting quick testing and improvement.
What are some common materials for a plastic prototype?
Plastic prototypes can be made from a variety of materials, each offering different characteristics suited to specific applications. Here are some common materials used for making plastic prototypes:
Thermoplastics
Thermoplastics are the most common material used in plastic prototypes. These plastics are solid (often in colored pipes) that can be melted, molded, and then cooled into different shapes. Thermoplastics are popular because they’re easy to recycle and reshape, and they work well for creating strong, functional prototype parts. In manufacturing, they’re often melted and injected into molds. Thermoplastics such as Acrylic, ABS, and Polycarbonate are widely used for creating plastic prototypes, especially ABS material is the most used material for various kinds of ABS prototypes.
Resins
Resins are synthetic materials that come from natural sources and are very flexible. Different resins can have properties similar to different thermoplastics. They can exist in either liquid or solid form and are often mixed with other chemicals to adjust their hardness or softness which makes them popular for creating plastic prototypes and commonly used in urethane casting and 3D printing processes. Resins are commonly used for making items like jewelry, home decor, coasters, and furniture tops.
How to make a plastic prototype?
There are four main methods to create a plastic prototype including CNC machining, 3D Printing, Urethane casting, and Prototype injection molding. Let us check these plastic prototyping processes:
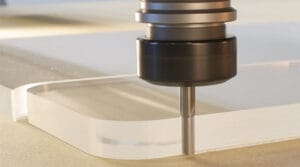
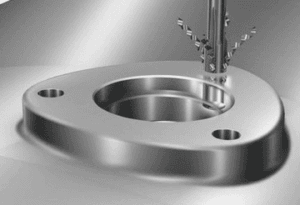
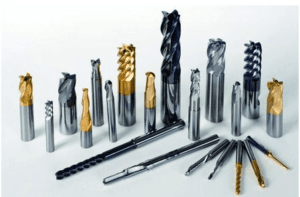
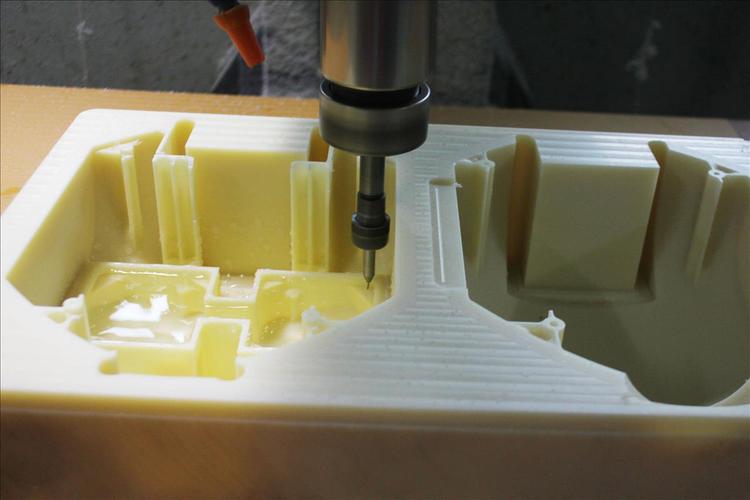
CNC machining
CNC machining is an effective method for creating plastic prototypes with high precision and accuracy. With computer-controlled cutting tools, a CNC machine can cut a solid block into a functional prototype. CNC machining offers lots of advantages for plastic prototyping, including fast turnaround times, high precision, and high-quality surfaces especially for the optic clear prototypes.
Steps for Creating a Plastic Prototype with CNC Machining
Step 1: CAD Design of Plastic Prototype
The design begins with creating a CAD model of the prototype. Given the constraints of CNC machining, complex plastic structures are often broken down into smaller, more manageable parts that can be easily processed by the machine.
Step 2: CNC Machining Process
Once the CAD design is finalized, CAM software generates the necessary CNC machine code (G-code and M-code). This step translates the design into machine-readable instructions, specifying tool paths, cutting depths, feed rates, and other machining parameters to ensure precise part fabrication.
Step 3: Assembly
After all individual components are machined, they are securely bonded together using adhesive techniques. This step ensures the final prototype has the required strength and integrity.
Step 4: Grinding and Polishing
The prototype’s surface is then smoothed by grinding to remove any rough edges or imperfections. Polishing techniques are applied to achieve a glossy, refined finish using specialized tools and compounds.
Step 5: Surface Finishing
Finally, the surface finish is applied according to the client’s specifications. Options include dyeing, painting, vacuum metallization, matte finishing, laser engraving, screen printing, and brushing to achieve the desired aesthetic effect.
3D Printing
3D printing is an additive manufacturing process. it creates the plastic prototype by depositing melted plastic material layer-by-layer based on a digital design file. in this way, 3D printing can manufacture prototypes with remarkable complexity and short lead time at low cost. it is the cheapest and fastest way to make a plastic prototype. there are different 3D printing technologies including FDM 3D printing, SLA 3D printing, SLS 3D printing, and DLP 3D printing.
Steps for Creating a Plastic Prototype with 3D Printing
Step 1: Prepare the 3D Printer
Begin by setting up the 3D printer, ensuring it’s properly calibrated, and that the print bed is clean and level. Select and load the appropriate printing material, and configure the printer settings to match the desired specifications for the prototype.
Step 2: Slice the 3D Model and Start Printing
Using slicing software, convert the 3D model into machine instructions, known as G-code. Adjust settings such as layer height, infill density, and print speed. Once the G-code file is ready, load it onto the 3D printer and begin the printing process.
Step 3: Grinding and Polishing
Once printing is complete, the prototype will undergo grinding and polishing. Similar to CNC machining, this step removes rough edges, supports, or imperfections, ensuring a smooth and polished surface.
Step 4: Surface Finishing
The final step involves applying surface finishing treatments. As with CNC machining, this could include methods such as dyeing, painting, or other aesthetic effects, depending on the prototype’s requirements.
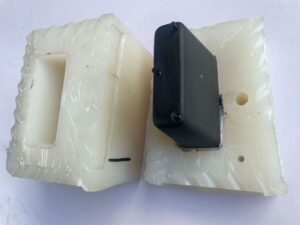
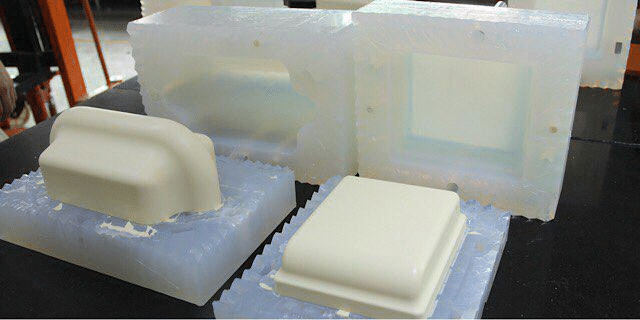
Urethane Casting
Urethane casting, also known as silicone molding or vacuum casting, is a cost-effective method for producing plastic prototypes with low-volume manufacturing of less than 100 pieces. This process has something similar to traditional injection molding, it uses a silicone mold to cast Liquid urethane resin to create urethane casting prototypes.
Steps for Creating a Plastic Prototype with Urethane Casting
Step 1: Create the Master Pattern
The master pattern serves as the model for making a silicone mold. It can be created using CNC machining or 3D printing, depending on the design complexity and material requirements.
Step 2: Make the Silicone Mold
Using the master pattern, a silicone mold is created. Liquid silicone is poured around the pattern, and air is removed to form a precise mold. The mold captures every detail of the master pattern for accurate replication.
Step 3: Cast the Prototype
Once the silicone mold is ready, mixed urethane resin is poured into the mold. After the resin has fully cured, the mold is opened to release the cast plastic prototype.
Step 4: Surface Finishing
As with CNC machining, the final prototype undergoes surface finishing. This may include sanding, polishing, or other aesthetic treatments to achieve the desired look and smoothness.
Prototype injection molding
Injection molding can be used for creating plastic prototypes even this process is mainly used for mass production. injection molding prototyping uses soft steel for tooling material and a more simple tooling constructor to inject low-volume plastic prototypes. this process is usually required to make the plastic prototype with the same material with mass production.
Steps for Creating a Plastic Prototype with Injection Molding
Step 1: Mold Design
The mold is designed with simplicity in mind to reduce costs, ensuring it meets the requirements for the prototype while keeping construction efficient.
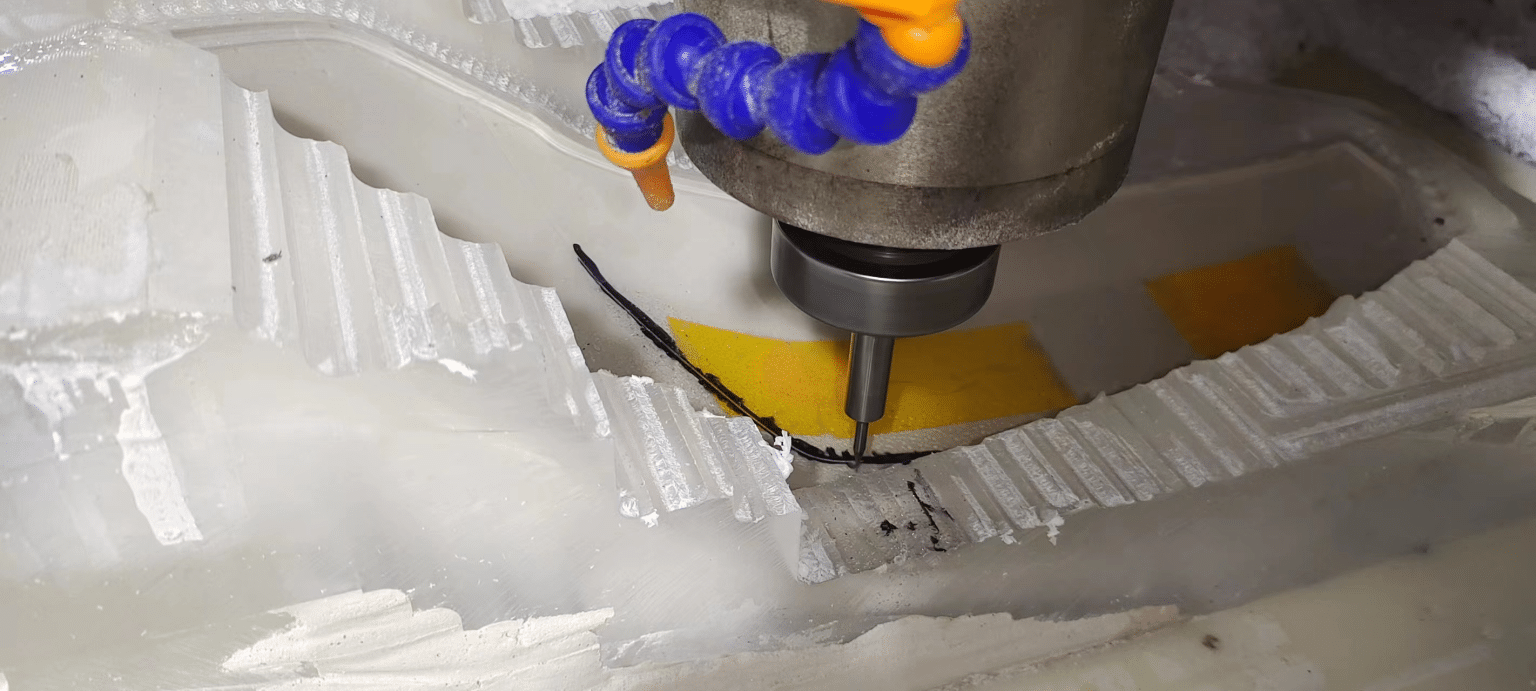
Step 2: CNC Machining the Mold
Using CNC machining, the mold is precisely crafted from soft steel according to the design specifications. This process shapes the mold to ensure accurate part formation.
Step 3: Injection Molding
Plastic material is injected into the mold cavity under high pressure, where it takes the shape of the mold. Once cooled, the plastic part is ejected.
Considerations Before Making a Plastic Prototype
Before creating a plastic prototype, it’s important to choose the right type based on your needs.
If you only need to showcase the product’s design without full functionality, visual prototyping is a great option. This type focuses on the appearance of the product, and 3D printing and urethane casting are commonly used to create these prototypes.
If you need the prototype to closely resemble how the final product will function, functional prototyping is the way to go. This type is crucial for testing and refining the product’s performance and how users interact with it. CNC machining is the right choice for this type of prototype.
For a prototype that is almost identical to the finished product, high-resolution prototyping is the best choice. This type is used for final evaluations, marketing, and stakeholder presentations, as it shows the product’s quality and finish in great detail. Injection molding will be a good option for these prototypes.
Comparison of Plastic Prototyping Methods
Different plastic prototyping methods use different plastic materials and with different timing and cost. we introduce a comparison for you when you need to choose for making a plastic prototype.
| Processing Methods | Materials | Application | lead time | cost |
|---|---|---|---|---|
| CNC machining | thermoplastic sheets such as Acrylic sheets, Polycarbonate sheets, POM sheets, ABS sheets, Nylon sheets, etc. | For those plastic prototypes with high precision and strength for function prototypes. | 3 to 7 days | Moderate |
| 3D printing | Photopolymers for SLA, and Plastic Filaments for FDM and SLS. | Use for just looks-like plastic prototypes. | 1 to 3 days | low |
| Urethane Casting | Rigid urethane Resins and rubber-like Urethane Resins are used for casting, a similar performance to engineering plastics. | Use for looks-like plastic prototypes with small quantities from 5 to 100 pieces. | 3 to 7 days | low for each piece |
| Injection molding | thermoplastic materials such as Acrylic, ABS, Polycarbonate, etc. | Use for function prototypes that have the same material performance as mass production | 15 to 20 days | High |
Conclusion
There are many factors you need to consider before creating the perfect plastic prototype such as materials, budget, and timing. KUSLA’s rapid prototyping service can help you make plastic prototype parts faster, easier, and more efficient. We support all of the above plastic prototyping methods with very high-quality standards.
FAQs
How Much Does a Plastic Prototype Cost?
the cost of a prototype depends on the prototyping process and the complexity of the parts. generally, A plastic prototype part can cost from $10 to $200, and for a complex prototype assemble can cost from $1000 to $10000 and even more.
How to make a plastic prototype at home?
With a desktop 3D printer, you can make a plastic prototype at home. just finish your design in the CAD software and load it into the 3D printer, then you can print the prototype with the materials prepared.